 Save
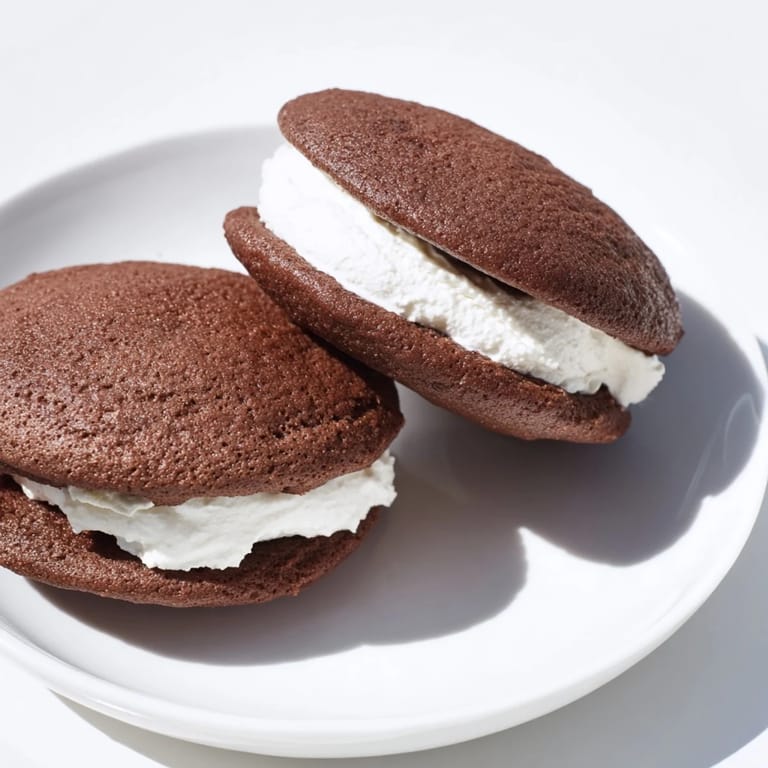
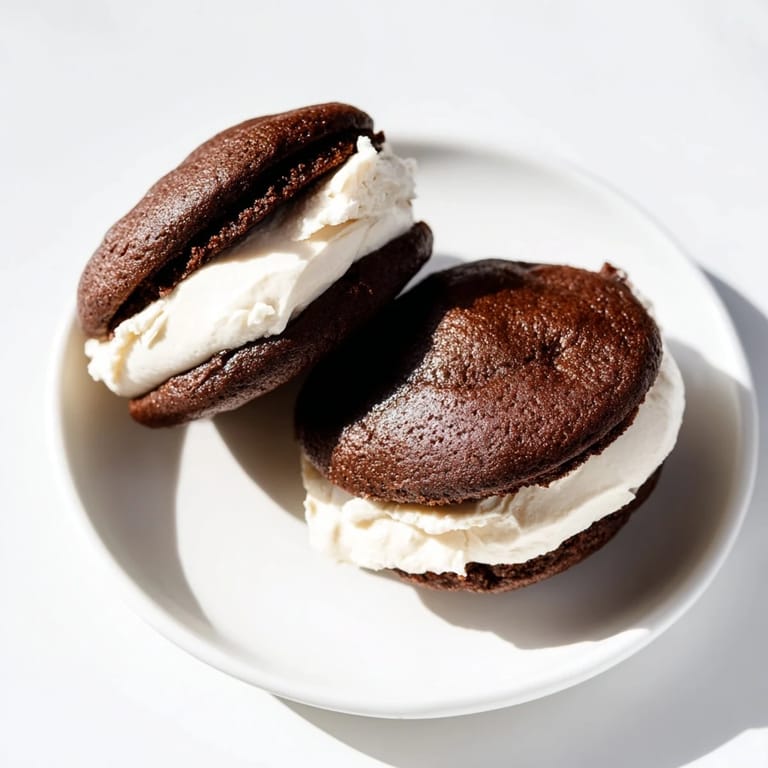
Save My grandmother kept a tin of whoopie pies on the kitchen counter, and I'd sneak one whenever I visited. The first time I tried to make them myself, I somehow ended up with undersized cakes that looked nothing like hers, but when I bit into that pillowy chocolate paired with the fluffy vanilla cream, I understood why she guarded that tin so carefully. Now, decades later, I've finally cracked the formula, and these soft, chocolatey sandwiches have become my own kitchen treasure.
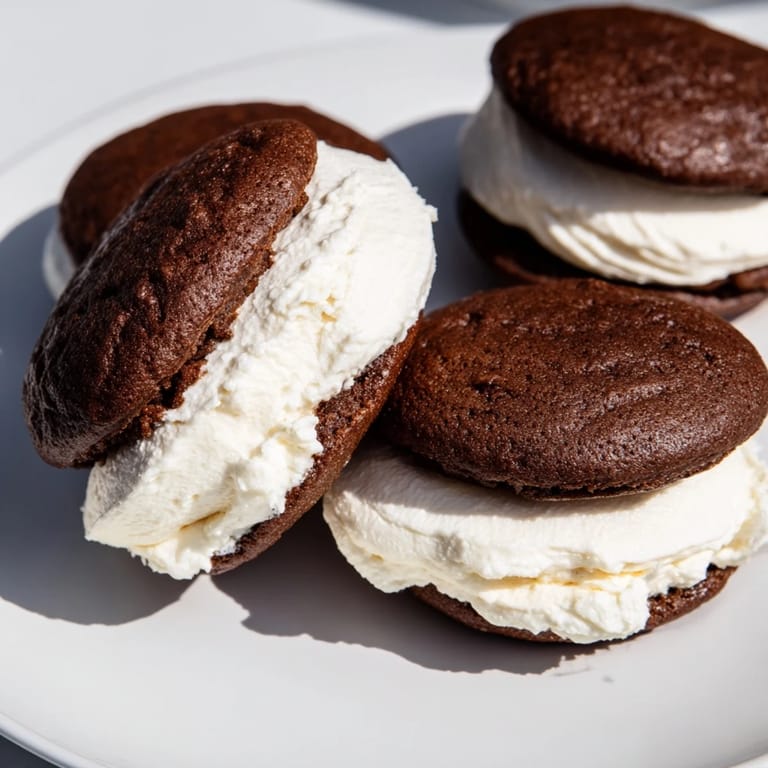
I made these for a bake sale fundraiser, and they disappeared before everything else on the table—even the fancy macarons. A woman came back asking for the recipe, saying they reminded her of childhood summers in Lancaster County, and I realized these whoopie pies carry a kind of edible nostalgia that transcends generations.
Ingredients
- All-purpose flour (2 cups): The foundation of tender cakes; measure by spooning and leveling, never scooping straight from the bag, or your pies will taste dry and cakey.
- Unsweetened cocoa powder (¾ cup): Look for Dutch-process if you want deeper chocolate notes; it makes a subtle but real difference in depth.
- Baking soda and baking powder (1½ teaspoons and ½ teaspoon): The lift here is crucial—too much and your cakes puff up too high and collapse, too little and they're dense.
- Salt (½ teaspoon): A small amount that makes the chocolate sing without tasting salty.
- Granulated sugar (1 cup): Beaten with butter and oil, it creates the fluffy crumb structure that makes these cakes special.
- Unsalted butter and vegetable oil (½ cup each): The combination gives you moisture and tenderness; butter alone makes them a bit more cake-like, oil keeps them impossibly soft.
- Eggs (2 large): Room temperature eggs mix in more smoothly and create a better emulsion with the wet ingredients.
- Buttermilk (1 cup): The acidity tenderizes the crumb and reacts with the baking soda for lift; don't skip this for regular milk.
- Vanilla extract (2 teaspoons): Half goes in the cake to round out the chocolate, the rest goes in the filling.
- Unsalted butter, softened (¾ cup): For the filling; softened means it'll blend smooth without overheating.
- Powdered sugar (2 cups): Sift it before measuring to avoid dense, grainy filling.
- Marshmallow creme (7 oz): The magic ingredient that gives the filling that cloud-like texture and keeps it from being too butter-heavy.
Tired of Takeout? 🥡
Get 10 meals you can make faster than delivery arrives. Seriously.
One email. No spam. Unsubscribe anytime.
Instructions
- Get Your Oven Ready:
- Preheat to 350°F and line two baking sheets with parchment paper. This matters more than it sounds—the parchment prevents sticking without extra grease that would make the bottoms greasy.
- Mix Your Dry Ingredients:
- In a medium bowl, whisk together flour, cocoa powder, baking soda, baking powder, and salt until everything is evenly distributed. You'll see little specks of cocoa throughout, which is exactly what you want.
- Cream the Sugar, Butter, and Oil:
- Beat them together in a large bowl for about 2 minutes until the mixture is light, fluffy, and pale—this aerates the batter and creates that tender crumb. It takes longer than you'd think, so be patient.
- Add Eggs and Vanilla:
- Add each egg one at a time, beating well after each addition so they emulsify properly. Mix in the vanilla, and the batter will smell incredible.
- Alternate Wet and Dry:
- Starting with the flour mixture and ending with it, add everything in three additions, alternating back and forth. This prevents overmixing, which would make tough cakes. Stir just until you don't see streaks of dry ingredients.
- Scoop and Bake:
- Drop 2-tablespoon mounds of batter onto your prepared sheets, spacing them about 2 inches apart because they spread slightly. Bake for 10 to 12 minutes—they're done when they spring back when you gently press the top, not when they look dark.
- Cool Properly:
- Let them cool on the pan for 5 minutes so they set slightly, then transfer to a cooling rack to cool completely. Warm cakes are fragile and will crack when you fill them.
- Make the Filling:
- Beat softened butter until it's smooth and creamy, then gradually add sifted powdered sugar so it doesn't cloud up your kitchen. Add the marshmallow creme, vanilla, and salt, then beat until fluffy and light, about 2 minutes.
- Sandwich Them Together:
- Spread or pipe filling onto the flat side of one cake, then top with another cake, flat-side down. Work gently so you don't crack them.
- Chill Before Serving:
- Pop them in the fridge for 30 minutes to set the filling and let the flavors meld. This is when they taste best—not rock hard, but firm enough to hold together perfectly.
 Save
Save The moment someone bit into one of these at a birthday party and their face lit up with recognition—that smile that says you've transported them somewhere warm and familiar—I knew I'd finally nailed it. These aren't just desserts; they're edible memories.
The Chocolate Cake Magic
The secret to these cakes isn't a fancy ingredient or technique—it's the balance between butter and oil. Butter alone makes them tender but slightly more cake-like; oil keeps them impossibly moist and almost pillowy. The combination of buttermilk and cocoa powder creates a tender crumb that stays soft for days without becoming gummy. I learned this after a dozen batches, and it completely changed the game.
Filling Flavor Variations
While the classic vanilla filling is timeless, I've experimented enough to know that a pinch of instant espresso powder stirred into the filling deepens the chocolate flavor without making it taste like coffee. Almond extract (just ¼ teaspoon) adds a subtle sophistication that guests can't quite name. You can even swap half the vanilla for almond extract to play with the flavor profile.
Storage and Make-Ahead Strategy
These whoopie pies stay fresh in an airtight container at room temperature for up to three days, though honestly, they rarely last that long in my house. You can also bake the cakes ahead and freeze them unfilled for up to two weeks, then thaw and fill them whenever you need them. Some bakers swear by using shortening instead of butter in the filling for a more stable, less melty texture—it's a classic approach worth trying if you're making these for warm weather or long storage.
- Store in an airtight container to keep them soft and prevent them from drying out.
- If you want extra-stable filling that won't soften in heat, swap half the butter for high-quality shortening.
- These taste even better the next day once the flavors have had time to settle and blend together.
 Save
Save Make these once, and you'll understand why they've been a beloved treat for generations. There's something about the combination of soft chocolate cake and fluffy vanilla cream that just feels like home.
Recipe FAQs
- → How do I achieve soft whoopie cakes?
Use buttermilk and oil in the batter for tenderness, and avoid overmixing to keep the cake soft and moist.
- → Can I substitute the marshmallow creme in the filling?
Yes, you can replace marshmallow creme with whipped cream or cream cheese for different textures and flavors.
- → What is the ideal baking time for the cakes?
Bake for 10 to 12 minutes until the cakes spring back when gently pressed, ensuring they remain moist inside.
- → How should I store these chocolate cakes?
Keep them in an airtight container at room temperature for up to three days to maintain freshness and softness.
- → Can espresso powder be added to enhance flavor?
Yes, adding a bit of espresso powder deepens the chocolate flavor without overpowering the other ingredients.