 Save
Save There's something about Ho Ho Cake that brings back the feeling of Saturday afternoons spent in my aunt's kitchen, watching her carefully roll out layers of cake and cream. She'd hum while working, and the kitchen would fill with the smell of vanilla and butter melting together. Years later, I finally understood why she loved making this cake so much—it's the kind of dessert that feels fancy enough for guests but comforting enough to eat straight from the pan on a quiet evening. The first time I made it myself, I was nervous about the layering, but once I tasted that fluffy cream between tender cake, I got it. This is the dessert that makes people linger at the table just a little bit longer.
I made this for my daughter's tenth birthday, and she asked for it three times that month before the actual day arrived. Watching her face light up when I brought it to the table made every careful layer worthwhile. She's seventeen now and still requests it for special occasions, which tells me everything about why this cake matters.
Ingredients
- All-purpose flour (2 cups): The foundation that needs to be whisked with baking powder and soda so your cake rises evenly and doesn't sink in the middle.
- Baking powder and baking soda: Don't skip whisking these together with the flour—it distributes them evenly and prevents pockets of bitter soda taste.
- Unsalted butter (3/4 cup for cake): Room temperature is non-negotiable; cold butter won't cream properly and your cake will be dense.
- Granulated sugar (1 1/2 cups): This is what gets creamed with butter to create tiny air pockets that make the cake light and tender.
- Eggs (3 large): Add them one at a time so they incorporate completely and give structure to the crumb.
- Vanilla extract (2 tsp): Use real vanilla if you can; it makes a noticeable difference in how the cake tastes.
- Whole milk (1 cup): The moisture that keeps the cake tender and prevents it from drying out during baking.
- Unsalted butter (1/2 cup for filling): Again, softened, because this creates the silky base for your cream.
- Powdered sugar (1 cup): Sifted if you have time, so there are no lumps hiding in your filling.
- Heavy cream (cold, 1 cup for filling): The secret to making the filling light—whipping it creates volume and airiness.
- Heavy cream (1/2 cup for ganache): Heat this gently; if it boils, your chocolate can seize up and turn grainy.
- Semi-sweet chocolate chips (1 cup): Good quality matters here because this is the final layer people taste and judge you by.
Tired of Takeout? 🥡
Get 10 meals you can make faster than delivery arrives. Seriously.
One email. No spam. Unsubscribe anytime.
Instructions
- Prepare your space:
- Preheat the oven to 350°F and grease your 9x13-inch pan with butter, then line it with parchment paper so the cake releases cleanly and you don't have to wrestle with it later. Having everything ready before you start mixing is the difference between a smooth process and scrambling.
- Build the dry mixture:
- Whisk together the flour, baking powder, baking soda, and salt in a bowl until they're evenly distributed. This step prevents lumps and ensures your cake rises uniformly.
- Cream the base:
- Beat the softened butter and sugar together until it's pale and fluffy, about 3 minutes—this should look almost like frosting. Adding the eggs one at a time and then the vanilla creates a silky batter that binds everything together.
- Alternate and fold:
- Starting and ending with the flour mixture, alternate adding the dry ingredients and milk to the butter mixture, mixing gently until just combined. Overmixing develops gluten and makes the cake tough, so stop as soon as you don't see streaks of flour.
- Bake the cake:
- Pour the batter into the prepared pan, smooth the top, and bake for 25 to 30 minutes until a toothpick inserted in the center comes out clean with maybe just a crumb or two. The kitchen will smell incredible, but resist opening the oven door—let it bake undisturbed.
- Cool completely:
- Leave the cake in the pan on a wire rack until it's fully cooled, which takes about an hour and makes it much easier to handle. This patience pays off when you're slicing.
- Make the cream filling:
- Beat the softened butter and powdered sugar until smooth, then in a separate bowl whip the cold heavy cream with vanilla and salt to stiff peaks. Gently fold the whipped cream into the butter mixture using a spatula until no streaks remain and the filling is light and fluffy.
- Slice and layer:
- Once completely cool, carefully turn the cake out onto a cutting board and use a serrated knife to slice it horizontally into two even layers. Take your time here; a gentle sawing motion works better than pressing down.
- Fill and chill:
- Spread the cream filling evenly over the bottom layer, then gently set the top layer back in place and refrigerate while you make the ganache. This keeps everything stable.
- Make the ganache:
- Heat the heavy cream and butter in a small saucepan just until steam rises, then pour it over the chocolate chips in a bowl and let it sit for 2 minutes before stirring. This gentle heating prevents the chocolate from burning and keeps the ganache silky.
- Final coat:
- Pour the warm ganache over the cake and spread it evenly with a spatula, letting some drip decoratively down the sides if you want. Refrigerate for at least 30 minutes so the ganache sets to that perfect snappy texture.
 Save
Save The moment that changed my Ho Ho Cake forever was when a friend mentioned in passing that she'd never had one as a kid, and I immediately offered to make her one. Seeing her genuinely surprised by how delicious homemade cake could be—so different from the packaged version—reminded me why I love cooking for people in the first place.
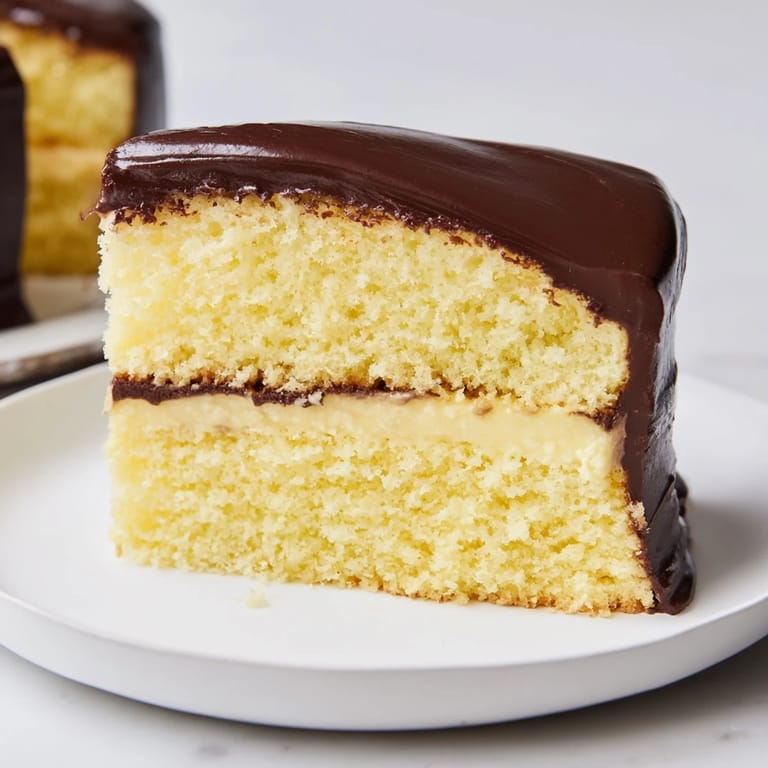
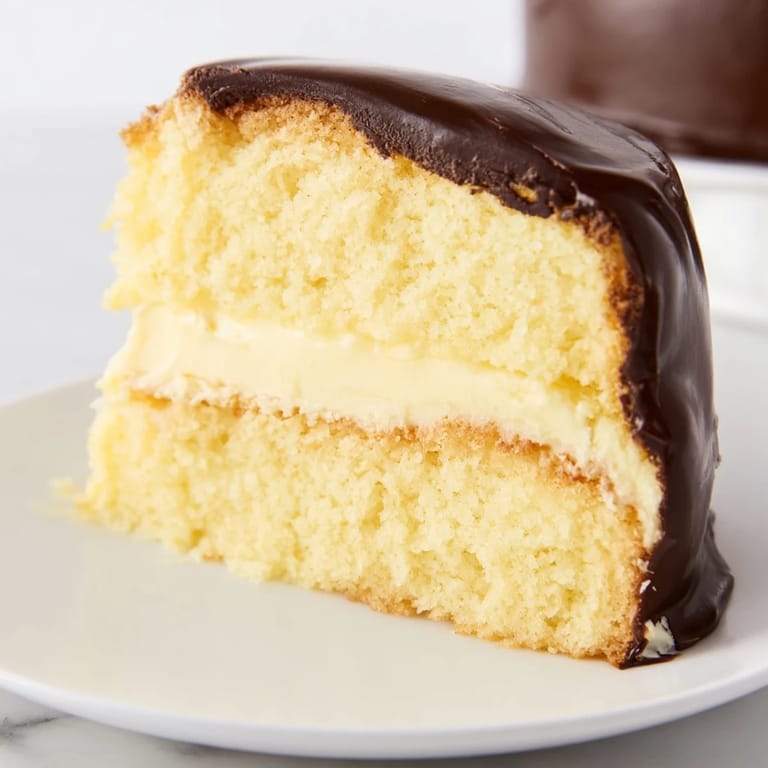
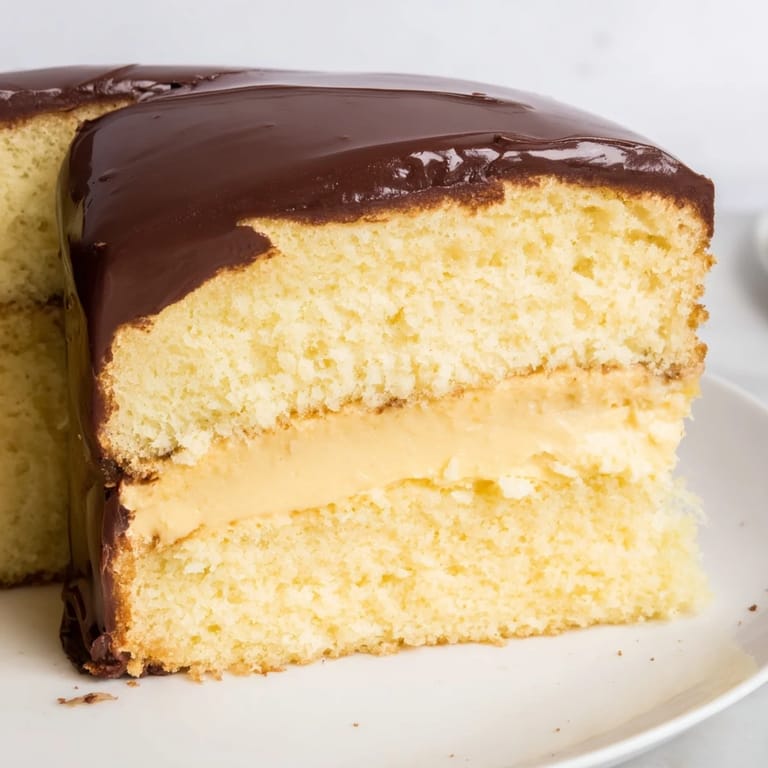
The Anatomy of a Perfect Ho Ho
This cake works because it's built on the contrast between three distinct textures: a tender, moist cake; a fluffy, almost mousse-like filling; and a glossy, snappy chocolate coating. Each layer has a job. The cake absorbs the sweetness of the filling without falling apart, the filling provides airiness and stability, and the ganache gives you that moment of chocolate luxury with every bite. Understanding these roles helps you appreciate why each step matters.
Storage and Keeping
This cake actually improves slightly after a day or two in the refrigerator because the flavors meld together and the cake absorbs some moisture from the filling. Store it covered in the fridge for up to three days, and it travels surprisingly well in a cake carrier if you're bringing it somewhere. If you need to make it ahead, assemble everything but the ganache, then add that final chocolate layer the morning you're serving it for the most beautiful presentation.
Making It Your Own
This recipe is sturdy enough to handle some creative tweaks if you're feeling adventurous. Some people replace the whipped cream with marshmallow fluff for an even lighter filling, or add a tablespoon of espresso powder to the ganache for subtle coffee notes. I've also experimented with using dark chocolate for a less sweet ganache, which balances beautifully against the sweetness of the filling.
- If you're short on time, the filling can be made a few hours ahead and refrigerated until you're ready to assemble.
- A serrated bread knife works better than a chef's knife for slicing the cake layers without crushing them.
- Letting the ganache come to room temperature slightly makes it easier to spread evenly without cracking the cake underneath.
 Save
Save This is the cake that reminds people why they love dessert in the first place. Make it once and it'll become the one people ask for on their special days.
Recipe FAQs
- → What makes the yellow cake tender?
Using a combination of butter, sugar, and eggs creamed together creates a light, tender crumb in the yellow cake.
- → How is the cream filling kept fluffy?
Whipping cold heavy cream to stiff peaks before folding it gently into a butter and powdered sugar mixture ensures a light, airy filling.
- → Can the ganache be easily spread?
Yes, by heating the cream and butter just until simmering and then mixing them with chocolate chips, the ganache becomes smooth and glossy, perfect for spreading.
- → How long should the cake chill before serving?
Refrigerate the assembled cake at least 30 minutes to allow the ganache to set properly and flavors to meld.
- → Are there any substitutions for the cream filling?
For a lighter alternative, marshmallow fluff can replace the whipped cream in the filling.